Simple do it yourself: DIY candles are very trendy. The darker season invites you to make yourself comfortable in romantic candlelight. The do-it-yourself kind is becoming increasingly popular, especially since DIY candles are personal and sustainable.
Sustainable decoration with DIY candles
Who doesn’t do this? Before the guests arrive, the old candle remains from the last party are scraped out of the candlestick holders and are replaced by new, unused ones. Of course, they are chosen and purchased for this particular occasion. They match the tablecloth, tableware, and decorations. Sure, that makes sense and looks good. But more and more people are thinking and acting sustainably. That’s where DIY candles come into play.
Simply Make Candles From Leftovers Yourself
All too often, after a party, the candles are hardly burned down. Sadly, they end up going into the trash, not giving an environmental thought to it at all. So let’s get to work! Use these candle remains to make wonderful new creations – from tea lights to impressive candles with a color gradient. How does it work? We’ll show you.
Materials for DIY candles
The list of materials to make your own individual DIY candle is not long. Basically, just a few small items that everyone has in the house are sufficient for making a candle:
- the most important first: old candle remains
- thicker thread made of 100 percent cotton
- empty, old tin can or similar metal container
- large pot for a double boiler
- molds for the candles, like old cups, glasses or egg cups
- empty toilet paper rolls
- toothpicks, nails, wooden spoon
Short Instructions for Do-It-Yourself
How does it work? Sort the candle remains according to taste and color preference and carefully heat them in a tin or other suitable metal container in a double boiler. Attention: The water must not boil and bubble over, otherwise the water will get into the melting candle wax. At about 70 to 80 degrees Celsius, the wax begins to melt. It is important to carefully remove impurities such as wick residue from the liquid wax. A fork or a spoon is best for this task.
Wick for DIY candles made easy
Prepare the new wicks before the production of the DIY candles can begin. Old shoelaces make a good, sustainable wick. You can also weave a new wick from three thick cotton threads. If the thread is thin, twist several threads firmly together to make the wick stronger. Now, dip the thicker cord into the hot wax and put it aside to cool down. The wick must consist of 100 percent cotton so that it does not produce any toxic fumes when they are burning.
Pour Wax Residues into Prepared Molds
Now there are several ways to create the candle of your choice. Pouring is one of them. Here, a toilet paper roll is used. Any other paper roll works just as well, of course. Place the roll into a container filled with sand to stabilize it. Then place toothpicks across the upper edges of the roll. Use these to pinch the prepared wick in the middle. You can also tie it to a toothpick or pencil to prevent it from slipping away. The end of the wick should reach the bottom of the planned candle.
Pour Beautiful Color Gradient Candles
 Now, the hot wax can be carefully poured into the roll. If another color is desired, let the first pour harden briefly and then continue with the next layer with wax in a different color. Repeat this as often as desired. After about two hours, the wax has usually hardened. The paper roll is now carefully removed, preferably when the wax is still warm but pressure resistant. Another possibility is to look for attractive, durable containers for your DIY candles. For example, old porcelain cups, preserving jars, egg cups, tea light holders, or funny baking cups work as great vessels. Remember to fix the wick again before pouring the candle, for example on the handle of a wooden spoon.
Extraordinary Shapes by Candle Making
Hand-dipping is another popular method for DIY candle makers. This technique produces long, tapered candles. You will need a very long wick that is several centimeters longer than the finished product. Knot a loop to the upper end of the wick, and attach a nail to the lower end preventing the candle from slipping off the wick while dipping it. Now the wick is dipped again and again into the container that holds the melted candle wax. After each process, you have to wait a short time until the wax has hardened. In the meantime, hang the candle on a hook by using the loop. If you twirl the wick after the first dips, you will fashion the candle into a wonderfully twisted shape.
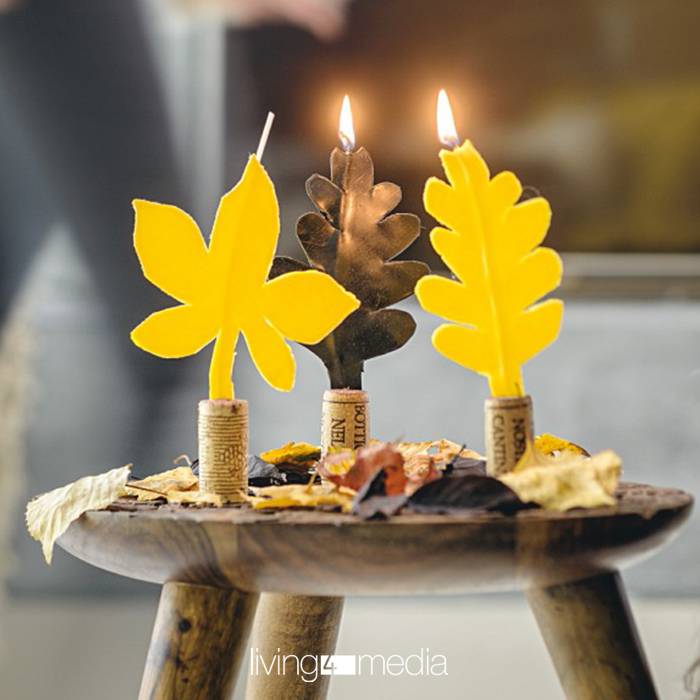
Imaginative DIY Candleholders are Decorative Eye-Catchers
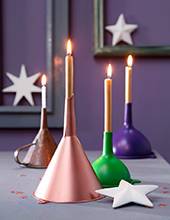 You can make creative do-it-yourself candle holders for these homemade candles. You can create decorative eye-catchers from simple everyday objects that are on hand in every household. Use wooden beads, discarded glasses, fir cones, pumpkins, colorful bottles, tree bark, cinnamon sticks, or even reindeer antlers – there are no limits to your imagination.
Bonus Points for Sustainability
Making DIY candles and DIY candle holders is a fun, creative activity that is fun for the whole family. The positive side effect is that the resulting unique pieces beautify your own home, and they are also ideal gifts. Yur guests will certainly be impressed by their individuality and your creativity. There are also clear bonus points in terms of sustainability. This is how you shine at every party.
Here is our inspiration for DIY candles and DIY candleholders
Cover: ©living4media / patsy&christian / 12345650


What do you think?
You must be logged in to post a comment.